How to Set Up a Merch by Amazon Store That Actually Sells
You've applied to Merch by Amazon, spent weeks checking your inbox, and finally received access. The dashboard looks simple enough: upload a design, add a title, choose products, and wait for sales. Then the practical problems arrive. Ten available slots disappear quickly, a phrase you thought was harmless triggers a rejection, and a design that seemed promising sits without enough traction to justify keeping it live.
That's the part most Merch guides underplay. A Merch by Amazon store isn't just a collection of graphics. It's a small catalog operating under invitation rules, tier limits, content screening, search competition, and account-risk decisions. Amazon launched Merch by Amazon on September 30, 2015, as a self-service print-on-demand program where creators could upload shirt designs while Amazon handled production, shipping, and fulfillment, as described on the official Merch by Amazon site.
The work that moves the needle happens before upload. You need a focused application, a defensible first batch, search-aligned listings, and a research process that checks rights before you invest time in artwork.
Table of Contents
- Why Most Merch by Amazon Stores Stall Before They Start
- Getting Through the Application and First 10 Uploads
- How Tiers and the 180-Day Window Shape Your Catalog
- Writing Listings That Match How Buyers Search
- Reducing Takedown Risk Before You Hit Publish
- Growth Levers Beyond Uploading More Designs
- A Realistic First 90 Days on Your Merch Store
Why Most Merch by Amazon Stores Stall Before They Start
The first email is usually anticlimactic. You submit an application, tidy up your profile, and wait without much visibility into what's happening. Independent industry estimates cited in a Merch by Amazon review place approval around 30% to 40% of applicants, with a reported waiting period of 2 to 8 weeks and no status updates.
When approval finally arrives, many sellers treat the first ten uploads as a creative showcase. That's a mistake. At Tier 10, you have only 10 active design slots, so a generic quote, a broad joke, or an unverified phrase consumes the same scarce space as a carefully researched niche concept. Amazon's own introduction to Merch describes the tier structure that controls how many designs a creator can have active, and the Amazon developer announcement remains a useful reference point.
The expensive mistakes happen early
A new seller might apply with an incomplete profile, then spend the waiting period designing unrelated products. Once accepted, they upload all ten because the empty dashboard feels uncomfortable. A few weeks later, the listings have little movement, one title contains a protected phrase, and the seller has no clear evidence about which audience was worth pursuing.
That store can look active while producing very little usable information. The problem isn't always the niche. It's the inventory decision made before the seller understood the constraints.
- Generic ideas get buried: Broad jokes and familiar quote formats compete with established catalogs and rarely give a new store a clear search angle.
- Trend timing goes wrong: A phrase can lose relevance before the listing gathers meaningful demand.
- Rights checks arrive too late: Sellers often inspect trademarks only after a rejection, when the safer decision would have been to discard the idea before creating the artwork.
- The profile does no selling: A half-finished Amazon presence gives the application less context and leaves the seller without a clear store identity.
I'd build the first batch around buyer intent rather than personal taste. That means researching a specific occupation, hobby, activity, or gift audience, then checking whether related products already attract demand. A practical starting point is this guide to the best niche for Merch by Amazon, especially when you're trying to avoid filling limited slots with guesses.
A store also needs a distribution plan outside Amazon if you're building an audience elsewhere. Sellers who manage product promotion across channels may find a resource on social media management for Shopify useful for organizing posts and campaigns without confusing social activity with marketplace validation.
The honest expectation is slower and more useful: the first catalog should teach you what deserves another upload. Consistency matters, but consistent research-aligned uploads matter more than heroic one-offs.
Getting Through the Application and First 10 Uploads
Start at the Merch by Amazon landing page and sign in with an existing Amazon buyer or seller account. The application should use your real name, a working email address, and a completed profile. Write a clear About section that explains the kind of original designs you create and the audiences you understand.
Don't make the profile sound like a broad agency pitch if you're applying with a focused portfolio. A niche-specific presentation gives the reviewer a clearer picture of your intended catalog. Approval isn't guaranteed, and the wait can be difficult because applicants may receive no progress updates.
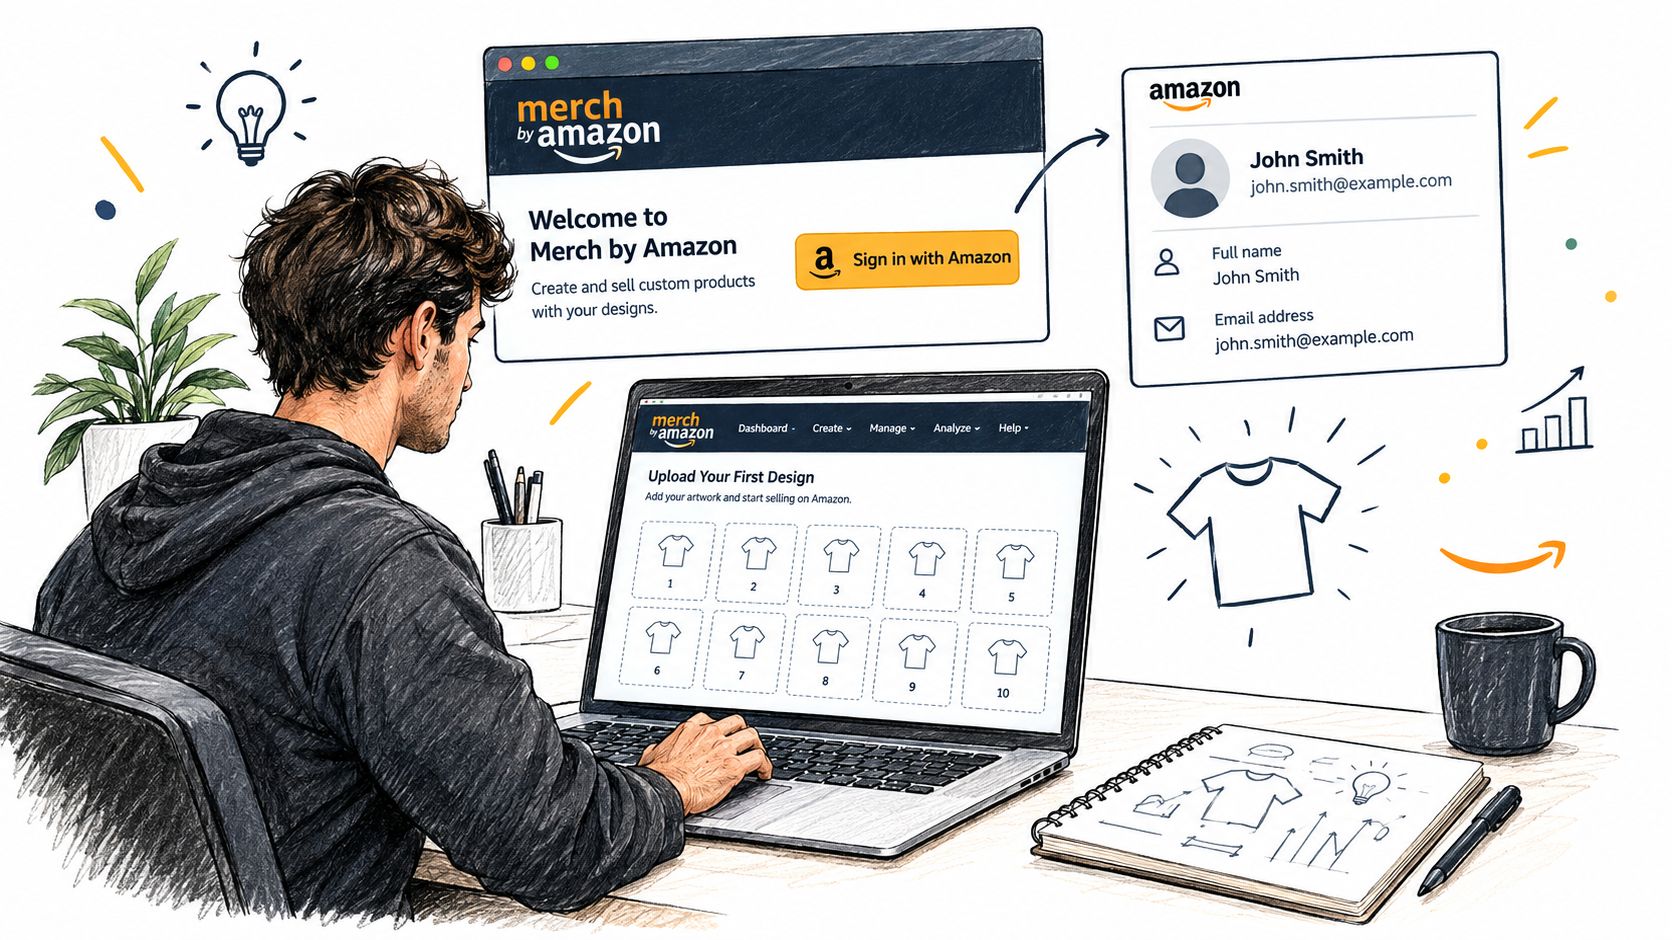
Once invited, accept the Merch on Demand agreement and review the dashboard before uploading. Set your default royalty preferences, prepare transparent PNG files that meet the current upload requirements, and use the Design Tool or a workflow that supports bulk preparation. Keep your file names organized by niche and concept. It makes later audits much easier.
Treat the first batch as a test
The first ten designs should answer a small number of practical questions:
- Who is the buyer? Define an audience such as trail walkers, a specific craft community, or a recognizable work identity.
- What would they search? Use natural buyer language instead of stuffing every related word into a title.
- What makes the design distinct? A narrow use case or audience angle is more useful than another general funny shirt.
- Is every phrase safe? Check the artwork, title, brand field, description, and tags before publishing.
Amazon's content policy prohibits intellectual property you don't have the right to use, including trademarks, copyrights, and another person's name or likeness. A visually original design can still create trouble if the wording references protected branding or a recognizable person.
Upload deliberately rather than treating ten slots as a quota. One design can test an evergreen audience, another can test an occasion, and the rest can explore closely related search intent. Keep notes on the phrase, audience, artwork version, price decision, and rights checks.
After the first group is live, inspect the listings as a shopper would. Check spelling, product mockups, mobile readability, and whether the title describes the design without sounding machine-generated. Then give the catalog enough time to produce signals before replacing everything at once.
The dashboard is easier to understand when you can see the upload and management flow in context:
How Tiers and the 180-Day Window Shape Your Catalog
Tier limits decide how many experiments you can run at once. Sellers typically begin at Tier 10, which allows 10 active designs, then may move through 25, 100, 500, 1,000, 2,000, 4,000, 8,000, and 100,000 or more designs, depending on performance and Amazon's rules. Amazon's tier structure was described in its Amazon developer announcement, but progression is controlled by Amazon rather than guaranteed by a seller's upload schedule.
The harder constraint is the 180-day window. A major Merch guide reports that products without a sale during the first 180 days may be removed, so unused designs can eventually lose their slots, as explained in Jungle Scout's Merch by Amazon guide. Treat that period as a test window, not as proof that every design must become a bestseller.
At a low tier, a slow design creates an immediate trade-off. It occupies one of only a few available slots, while another concept could be collecting buyer response. If a design still has no sale during the relevant period, it may also face removal. Upload order therefore matters more in a small catalog than in a large one.
| Tier | Active Design Slots | What Generally Matters at This Tier | Shelf-Life Implication |
|---|---|---|---|
| Tier 10 | 10 | Use each slot to test a clear audience or search angle | Weak designs leave little room for new tests |
| Tier 25 | 25 | Build on concepts that show buyer response | Related variations fit more easily, but unused slots still matter |
| Tier 100 | 100 | Organize tests by niche, audience, and product idea | A larger catalog supports more deliberate comparison |
| Tier 500 | 500 | Keep uploading tied to evidence rather than volume alone | Prune weak ideas before the catalog becomes difficult to monitor |
| Tier 1,000 and above | 1,000 or more | Maintain compliance and review performance across the catalog | More capacity also creates more listings to check and manage |
Tier growth has no dependable timetable. Amazon controls progression, so a seller should not build a financial plan around reaching a particular tier by a particular date. The practical rule is to let catalog evidence guide the next upload. A design that earns demand can justify related concepts. A design that does not should make room for a better test.
Start with niches that show buyer intent on Amazon. Use newly available capacity for adjacent ideas rather than unrelated categories. A higher tier without conversion gives you more listings to maintain, not automatically more income.
Writing Listings That Match How Buyers Search
A Merch listing is a compact landing page. The title acts like the headline, the description gives the shopper context, and tags help Amazon connect the product with related intent. Each field should contribute something different.
Lead with the phrase a buyer would naturally type. For example, “Vintage Hiking Mountain Shirt for Outdoorsy Dad” communicates the design, audience, and gift angle without turning the title into a string of disconnected keywords. The description can then explain the visual idea, intended wearer, activity, and occasion in normal language.
Don't repeat the same phrase across every field. Keyword stuffing makes the listing harder to read and can create unnecessary policy risk. Instead, use related terms that clarify the product's purpose.
Match tag breadth to search intent
Front-end and back-end tags serve different jobs. Front-end terms are visible on the listing surface, so they should stay readable and brand-safe. Back-end tags can capture synonyms, use cases, gift language, and audience terms that don't fit naturally in the title.
| Tag Field | Purpose | Best Use | Common Mistake |
|---|---|---|---|
| Front-end title terms | Explain the product to shoppers | Use the strongest natural phrase first | Stacking unrelated keywords |
| Visible description language | Add context and audience relevance | Describe who might wear or gift the design | Repeating the title mechanically |
| Back-end tags | Expand relevant search matching | Add synonyms, activities, occasions, and audience terms | Adding protected names or irrelevant traffic terms |
| Brand field | Identify the design brand or collection | Use a consistent, safe store identity | Treating it as extra keyword space |
For the hiking example, back-end terms might include “nature lover gift,” “trail walker,” “national parks,” and “father grandson camping.” Those phrases reach use cases the title alone may miss, but they still need to describe the design.
Before building a keyword list, use a focused process such as this guide on how to find niche keywords. Then compare the phrase against Amazon results and your rights checklist. Search volume by itself isn't enough if the term attracts the wrong audience or carries ownership risk.
Price for the product economics
Don't copy the top listing's price without understanding your own margin target. Compare the royalty outcome across the available price choices, then choose a level that fits the product, audience, and competitive context. A premium garment may justify a different decision from a basic shirt, but the listing still needs to communicate why someone should choose it.
Presentation affects conversion, too. Strong artwork is essential, but product previews need to show the design clearly at a glance. If you're testing enhanced product imagery or creative variations, a resource on agentic photo editing for conversions offers relevant context for ecommerce image workflows.
The practical test is whether a stranger can answer three questions quickly: what is the shirt about, who is it for, and why would they wear or gift it?
Reducing Takedown Risk Before You Hit Publish
Most takedown problems begin as research problems. Sellers often see a phrase that looks generic, design around it, and only investigate ownership after Amazon rejects the listing. By then, the artwork is finished and the seller feels pressure to defend an idea that was never safe enough to upload.
Amazon's policy covers more than logos. It also addresses trademarks, copyrighted material, and names or likenesses. That means you need to review the words in the title, brand field, description, and tags, not just inspect the graphic for a visible logo.
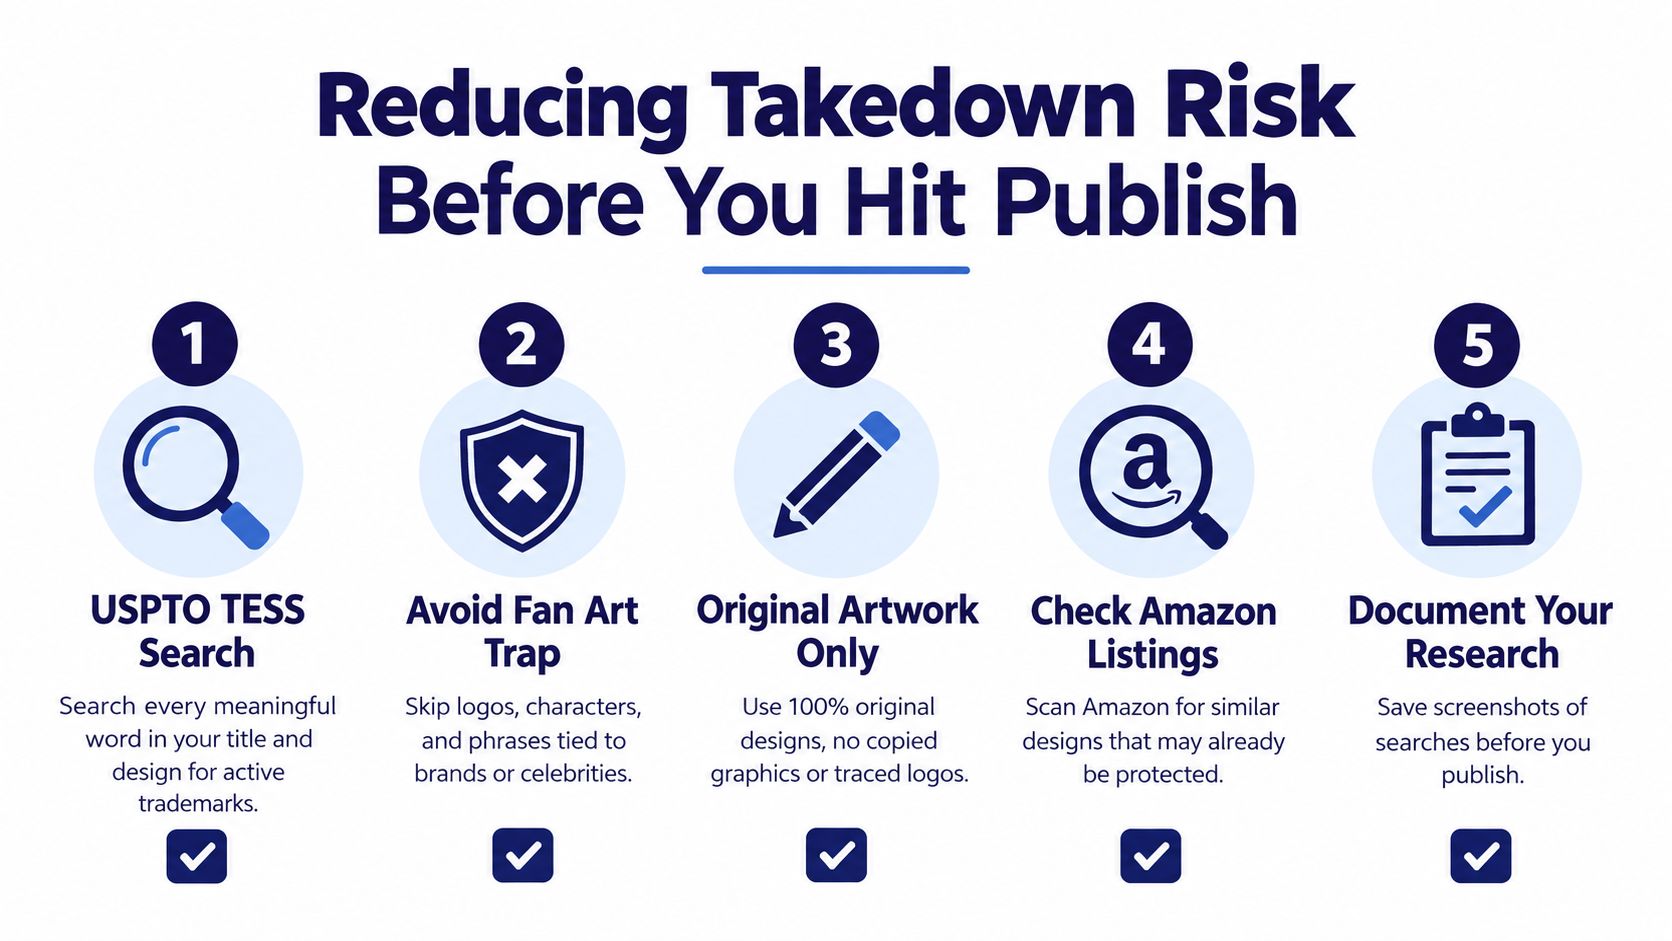
Use a pre-publish rights workflow
Run a USPTO search for every meaningful phrase. Check band names, university references, city nicknames, athlete names, fictional characters, and slogans even when the wording feels common. A trademark search doesn't replace legal advice, but it helps you identify obvious risks before they enter the catalog.
Then check common-law usage across Amazon, Etsy, Redbubble, and Google Shopping. Registration isn't the only signal that a phrase may be associated with another business or creator. If a phrase repeatedly appears as a branded product identity, treat that pattern seriously.
Your checklist should include:
- USPTO search: Review meaningful words and phrases connected to the design.
- Marketplace scan: Look for established branded usage across relevant shopping sites.
- Amazon comparison: Search the phrase and inspect whether the results suggest a protected identity.
- Original artwork review: Remove copied graphics, traced logos, fan art, and recognizable characters.
- Documentation: Save research notes and screenshots so you can reconstruct your decision later.
For additional brand protection context, compare your process with SelfServe's anti-counterfeit strategies. The point isn't to imitate a brand's enforcement program. It's to adopt the habit of documenting ownership signals before publication.
A personal blocklist helps. Record rejected phrases, the reason you rejected them, and any related terms that should also be avoided. Amazon may not provide a complete explanation for every rejection, so your own history becomes valuable operational evidence.
Store-first validation adds another layer. Search Amazon before designing, identify products that appear to sell within the niche, and inspect whether the demand is tied to a broad audience or a protected brand. Trendlytic is one option for this workflow. It analyzes live bestseller data across Amazon Merch, TeePublic, Redbubble, and Etsy, and includes a USPTO trademark check for search terms.
Use the Merch by Amazon trademark protection guide as a reference for building a repeatable review process. The safer upload is often the design you decide not to make.
Growth Levers Beyond Uploading More Designs
Uploading more is the obvious growth lever, but it's also the easiest one to misuse. A larger catalog doesn't help if the listings target scattered audiences, carry weak titles, or create repeated compliance exposure. Tier progression matters because it opens more active slots, yet those slots only become useful when the store can turn them into relevant tests.
I'd separate growth work into four decisions.
First, improve the listings that already show signs of life. Review titles, descriptions, tags, and product presentation on designs that earn attention or sales. Change one meaningful variable at a time so you can tell whether the improvement came from the keyword, the artwork, the price, or the product choice.
Second, separate evergreen ideas from newsjacking. Evergreen designs can remain relevant through changing search conditions, while timely designs may spike and disappear quickly. Newsjacking can be tempting, but the rights and timing risk is higher, especially when the phrase depends on a public event, celebrity, team, or brand.
Third, prune with evidence. Designs that haven't sold in a long period may deserve replacement, but don't delete blindly. Check whether the problem is poor indexing, weak presentation, a mispriced product, or a niche with no buyer intent. Keep a record of what you remove so you don't recreate the same idea later.
Fourth, test external traffic selectively. Pinterest pins or relevant Reddit participation can support a proven design, but paid advertising can weaken the economics of a royalty-based product. External traffic should validate an existing buyer response, not compensate for a listing that has no clear audience.
Diversification also needs discipline. Redbubble, TeePublic, and Etsy can expand distribution, but mirroring an unproven Amazon catalog across every platform usually spreads attention thin. Stabilize the Amazon workflow first, then adapt proven concepts rather than copying every upload everywhere.
The sensible order is listing quality, deliberate tier progression, catalog pruning, and selective external traffic. Volume comes after those decisions, not before them.
A Realistic First 90 Days on Your Merch Store
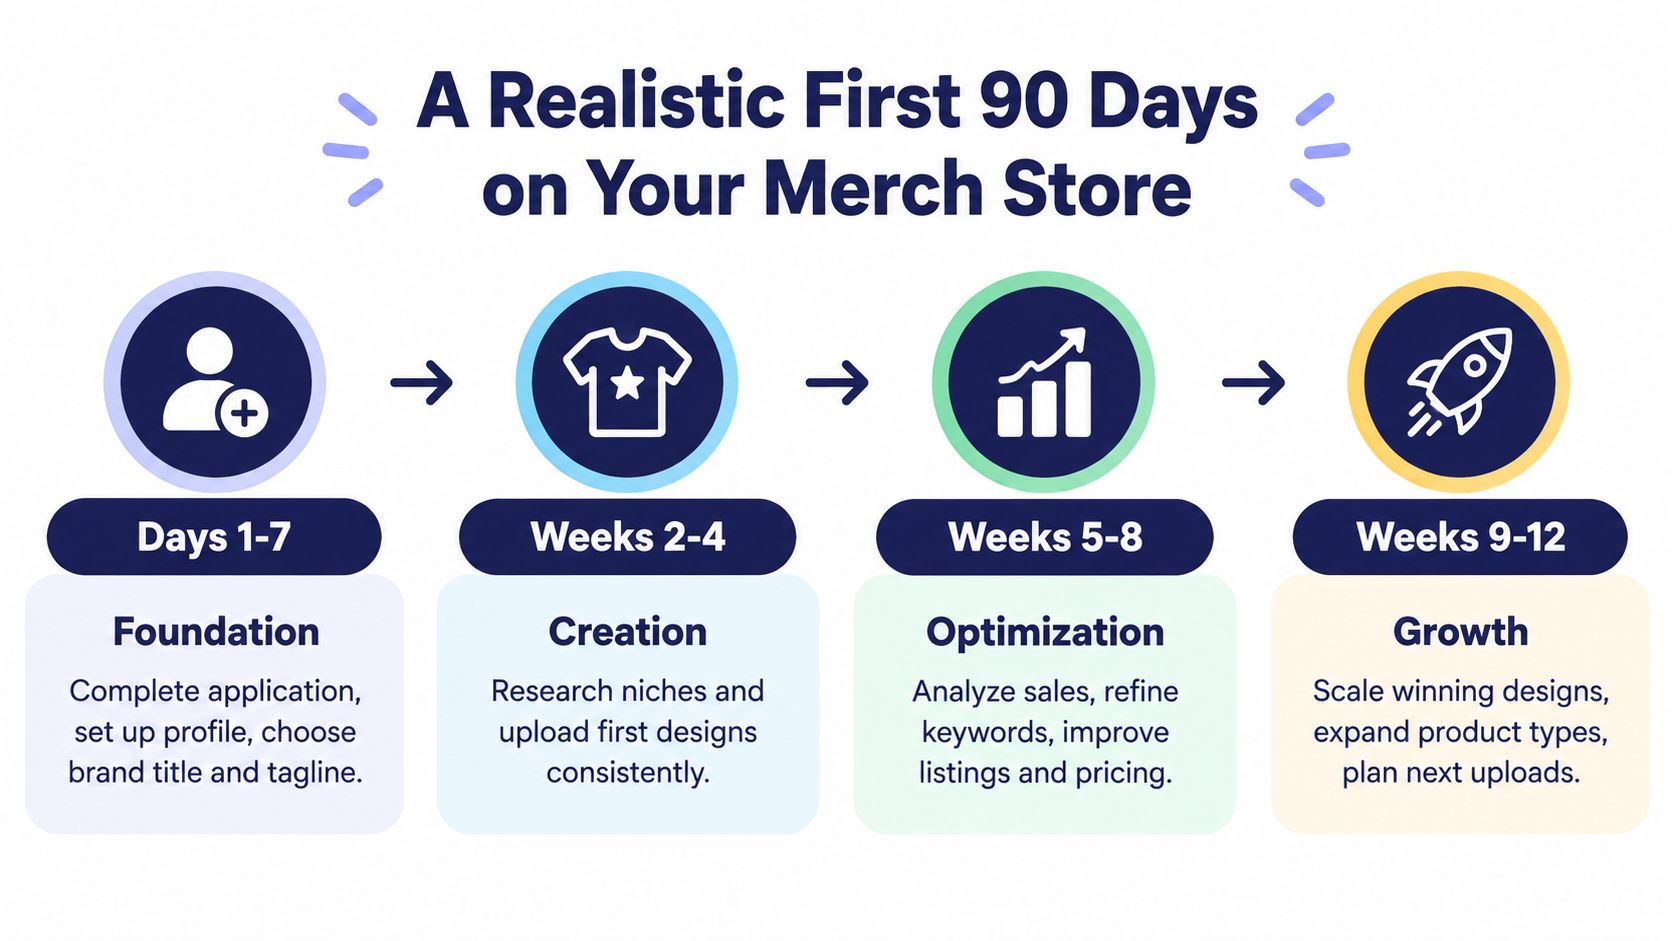
The first week should be administrative and strategic. Submit a clean application, complete the profile, choose a working store title and tagline, and define the audience you intend to serve. Don't spend the waiting period producing dozens of unrelated designs. Build a small idea bank and begin the rights checks early.
Weeks two through four are for the first ten uploads if access has arrived. Validate each niche through Amazon search and a USPTO review, then write the title, description, tags, and price as one connected listing. Use a single price test per shirt rather than changing several variables at once.
Use the next weeks to learn, not panic
Weeks five through eight should focus on signals. Check which designs earned impressions or sales, identify the weakest concepts, and replace them with refined versions of the niches that showed clearer buyer intent. Keep an eye on rejection patterns, especially recurring wording problems.
Weeks nine through twelve are appropriate for lightweight traffic experiments. Share a relevant design through Pinterest or a subreddit where the product fits the conversation, without spamming communities. Watch royalty movement and listing behavior rather than assuming every visit will become a sale.
| Period | Main Work | Useful Output |
|---|---|---|
| Days 1 to 7 | Application, profile, store identity | Clear audience and research list |
| Weeks 2 to 4 | First ten designs and listing setup | A controlled initial catalog |
| Weeks 5 to 8 | Performance review and refinement | Better understanding of viable niches |
| Weeks 9 to 12 | Selective external traffic and planning | A repeatable next-upload process |
The first quarter's goal is data, not income. By the end of it, you should know whether you can identify safe niches, write searchable listings, and produce designs for a repeatable audience. You may find a direction worth scaling, or you may decide the channel's constraints don't suit your working style.
That's a useful result either way. A Merch by Amazon store becomes easier to manage when every upload has a reason, every phrase has been checked, and every replacement teaches you something.
Trendlytic helps POD sellers research Amazon Merch niches alongside TeePublic, Redbubble, and Etsy, using store-first bestseller signals, keyword discovery, and a built-in USPTO trademark check. Visit Trendlytic to compare demand and competition before you commit your next limited upload slot.